Tinker Crate from Kiwi Co is a subscription that develops hands-on STEM projects to your door each month. Each month, you will get to follow a blueprint and create an awesome project! Some of their crate projects are a Trebuchet, a Hydraulic Claw, and Fiber Optic Stars. Plans starts from $16.95 per month, and shipping is free in the U.S.
Today I will be reviewing their holiday themed crate, Santa’s Light-Up Workshop!

There was a little bit of packing material in the bottom of the box, and all of the crate’s materials arrived in good condition. The supplies were organized neatly, and separated into little plastic bags.

The project included a blueprint, which gave step-by-step instructions along with helpful visuals.

I love that the Included Materials section of the blueprint showed pictures of each item! This makes it easy for a child to organize the materials, and make sure they have everything they need.


There are two parts to the instructions:
A. Build The Walls (8 steps)
B. Add the Roof (9 Steps)
This is a very hands on project, and took me about an hour to complete. If you are working with a kiddo, plan on it taking 90 minutes or so.

This box included: wall panels, roof panels, translucent beads, clear cord, a glue stick, pipe cleaners, pom pomps, clear stickers, foam rectangles, a 9V battery, an LED strip, a foam base, vellu sheets, and a glue pen.

The first thing I did was decorate each of wall panels. This was an optional step, so I just used a couple of sharpies that I had on hand. I added strings of holiday lights and a couple trees to make it look more festive.

The next step was to glue vellum sheets to the back of the wall panels, to give the windows a frosted glass appearance.

Next, I stuck the three panels into the slots on the foam base. Each panel had little notches on the side, so they snapped together easily.

I stuck an LED strip in the middle of the house; this is what will light it up!

I stuck the 9V battery in its case, and attached the case to the back of the 4th wall panel. I connected the black and red wires running from the case to the LED strip’s corresponding wires.

The case has a little On/Off switch that lines up perfectly with a hole in the 4th wall panel. This lets you turn the LED lights on and off easily.


That was the end of Part A, so let’s move on to Part B: building the roof! I ran a clear plastic cord through a notch on the side of a roof panel, and kept it in place with a clear sticker. I strung colorful beads on the cord, until I had one bead for each hole in the row. Once the cord was filled with beads, I secured the other side to the back of the panel with another clear sticker.

I repeated this process, until both roof panels had two rows of colorful beads.

I placed rectangular foam stickers on the bottom of the roof panels, aligned them with the wall tabs, and pressed them into place.

Lastly, I attached a beaded cord to the top of the roof!

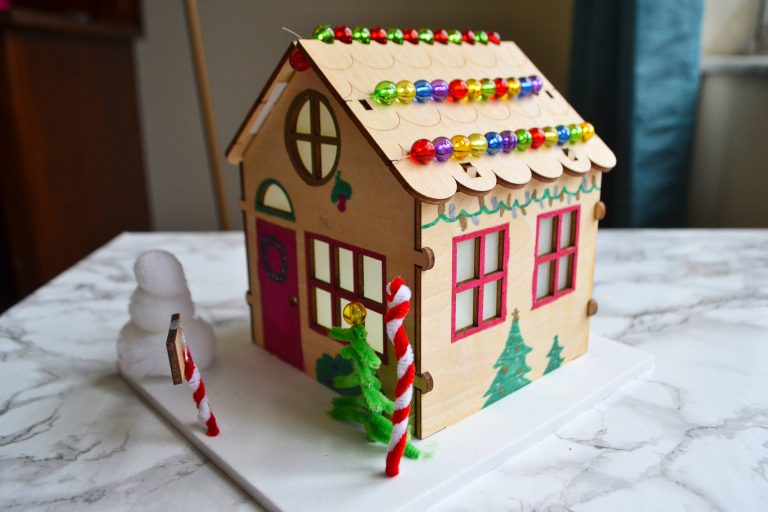
That was the final step in the instructions, but I decided to use their bonus materials to create a snowman, a sign, a holiday tree, and a candy cane. It turned out so cute, and I love how it looks when it’s lit up.


This was a fun craft, and it would be a great family holiday activity. If your child is interested in hand on activities, check out Tinker Crate! It’s an affordable way to create STEM projects while also having a good time.